
May 26, 2021

May 19, 2021


May 12, 2021

May 5, 2021

April 28, 2021

April 21, 2021

April 14, 2021


April 7, 2021

March 31, 2021


March 24, 2021
March 17, 2021

March 10, 2021

March 3, 2021


February 24, 2021
February 17, 2021
February 10, 2021
February 3, 2021
SNOW FUN!
Go outside and play in the snow. Build a snowperson, sled, make snow angels, or make snow cream.
Just have fun in the snow.
SNOW CREAM
Fill a large bowl with snow.
Add milk to make it creamy.
Add about a teaspoon of vanilla.
Add at least 1 large spoonful of sugar.
Stir until creamy.
Add chocolate syrup of anything else you might put on ice cream.
Enjoy!
Homemade Puzzle
Draw a picture of a way you can build and make a relationship stronger with love. Use a piece of poster board or index paper. Your picture can be of you and a friend having fun, making a snow person with your brother or sister. Anything that builds a relationship with love.
Color your picture.
Cut your picture into as many puzzle pieces as you want.
Ask someone to put your homemade puzzle together.
January 27, 2021
FISH DRAWING
Draw a picture, glue blue material, or use blue tissue paper to create water and waves on a piece of butcher paper or a large piece of construction paper.
Take small pieces of string and glue across your paper to create a net on the paper.
Put it up on a wall, with your parents’ permission.
Cut out several fish out of construction paper. Write the names of people you know who you would like to fish for and then glue or tape your fish onto the picture. You can also draw fish on your paper and write the names on the fish that you draw.
Then pray for these "fish" and ask God to help you to become a fisher for people.
SINK OR FLOAT
Fill a large, clear container with water or put water in your bathtub.
Remember that when the fisherman caught the large load of fish that their nets became so heavy that they began to sink. So, find some toys, pencils, anything you can put into the water.
Predict if it will sink or float in the water. Put the item in the water and find out what happens.
BOOKMARKS
Use an index card or cardstock and cut out a bookmark.
Copy the words below onto the bookmark and decorate it using whatever materials you have available.
I will be a fisher of people.
Put the bookmark somewhere that you will see it often and be reminded that God can use us to do amazing things. You can be a fisher of people.
Play the card game, Go Fish.

January 21, 2021
You know how Mrs. A and Ms. Kristen love to read books about all topics. Below is a short list of books that you might want to read about justice and fairness. There are many others that you might find that aren’t on the list. I challenge you to find and read two books about social justice and fairness.
Book Suggestions for Justice and Fairness
Counting on Community by Innosanto Nagara
A is for Activist by Innosanto Nagara
Say Something by Peter H. Reynolds
Skin Again by bell hooks
Colors of Us by Karen Katz
Happy in Our Skin by Fran Manushkin
Let's Talk About Race by Julius Lester
A Kids Book About Racism by Jelani Memory
Let the Children March by Monica Clark-Robinson
Not My Idea: A Book About Whiteness by Anastasia Higginbotham
Something Happened in Our Town: A Child’s Story about Racial Injustice by Ann Hazzard, Marianne Celano, and Marietta Collins
This is Our House by Michael Rosen
It’s My Turn by David Bedford
Miss Spider’s Tea Party by David Kirk
The Greedy Python by Richard Buckley
It’s Not Fair by Carl Sommer
The Doorbell Rang by Pat Hutchins
Jamaica Tag-Along by Juanita Havill
Everett Anderson’s Friend by Lucille Clifton
Alexander Who Used to Be Rich Last Sunday byJudith Viorst
Rosa Parks: First Biography by Lola M. Schaefer
Picture Book of Anne Frank by David Adler
The Sneetches by Dr. Seuss
Teammates by David Halberstam
Fairness: The Story of Nelly Bly by Spencer Johnson Minty
The Story of Harriet Tubman by Alan Schroeder
Baseball Saved Us by Ken Mochizuck
Fair is Fair – World Folktales of Justice by Sharon Creeden
Picture Book of Sojourner Truth by David Adler
The Cow of No Color by Nina Jaffe

One Love Art
Supplies:
· 1 Sheet of each; Blue, Yellow, Tan, and Pink Construction Paper.
· 1/2 Sheet of Red Construction Paper.
· Scissors.
· Pencil.
· School glue or a Glue Stick.
First, trace each of your arms and hands on the yellow, pink, and tan sheets of construction paper. Place the blue sheet aside until all of your hands have been traced and cut out.
Then, cut each one out. You should have a total of six hands and arms cut out. Next, cut out a heart shape using the red construction paper piece.
Now, use the glue stick and add a strip of glue to each finger, hand, and arm. Make sure your left and right hands are facing the right way.
Then, place two matching hands on each of the short sides of the blue construction paper. Place the hands so that the thumbs make a small heart in the middle.
Next, place the last two hands on the top and bottom of the paper. The fingers should meet in the middle area. Then, apply glue to the back of the heart, and stick it in the middle of the blue construction paper. It should look like the hands are all holding the heart together.
An Emoji a Day
Emojis have become a meaningful way we communicate with one another—communicating our moods, feelings, thoughts, interests, and identity. How do you use emojis to express different things, including aspects of who you are?
Click on the link to see how a 22--year-old digital artist from the Ivory Coast, created his own emojis, to reflect his life in West Africa and important characteristics of who he is.
Think about important aspects of who you are and if you can find an emoji that reflects your life.
Then create a list of new emojis you can make. Use markers, colored pencils or make them digitally. Set a goal to create one emoji per day (or week).
Mrs. A would love to see your new emojis.
Me Museum
Museums hold collections of an artist’s work, history, and many other important aspects of life. Think of all the kinds of collections you might see at a museum (e.g., paintings, artifacts, drawings, photographs, sculpture, collage, architecture, textiles, ceramics, fashion, etc.).
Create a collection about yourself as a way to explore and express your identity.
What kinds of items do you want to include in a museum about yourself? Think about how you can represent social identity characteristics like race, gender, ethnicity, religion, age, etc. plus other aspects of identity like hobbies, interests and talents with their collection.
Then gather and organize those artifacts, photographs, drawings, and other items that represent who you are. Share your museum collection with your parents, grandparents, friends in any way that is possible.
January 6, 2021
Shine Your Light
Find or get a battery powered candle at home. Use this candle as a reminder to be a “light of the world,” just as Jesus is. Christ, as the Light of the World, is our source of light, and our "lights" should reflect Jesus. I challenge you to care for your lights, making sure the ‘flame’ stays bright and shining. (by keeping the batteries new) I challenge you to keep your lights shining, and I challenge you to follow through with activities that let your light shine. (Such as being kind, giving to the blessing box, being compassionate, helping a friend, listen to a friend that is having trouble, and more.)

Decorate your candle to make it really special. Use whatever you might have around your house. You can add the words, “Let my light shine, every day.”
Listen to Music
With help from an adult, find the following songs and play them. Listen to the words. They are all about shining your light to the world.
Godspell, You Are the Light of the World
Newsboys, Shine
Hilary Duff, Shine
Rascal Flatts, Shine On
Collective Soul, Shine o
This Little Light of Mine
Glow-in-the-Dark Jar

Materials:
· Glass Jar – the bigger the nicer
· Glowing/Luminous paint
· Paintbrush
· Water
Wash your jars clean.
Mix the paint using the brush to make sure glowing particles are evenly distributed.
Make tiny dots inside the jar. The more dots, the better.
Expose your jar onto light or sunlight and see it glow in the dark.
January 6, 2021
STAR ART
Trace and cut out a large yellow star.
Write or cut out the words WISE PEOPLE STILL SEEK JESUS!
Hole punch the top and use ribbon through the hole to hang your star at home!

Wise Men Craft
The Wise Men are made from paint sticks.
Simply paint the sticks in bright rich colors. Be sure to leave room at the top for the face. Paint the faces with any color from tan to black. The beards can be scraps of brown peel-and-stick fun foam, yarn, felt, or anything you have around to make a beard. Since the wise men were not kings, there are examples below of what they may have worn on their heads. The "turban" is a scrap of fabric. You may also make a crown if you want. Be sure to add “bling” to the turban.
The eyes are two dots made with a Sharpie.
You may add a scarf or cape with fabric or paper. Be sure to decorate your wise men.
Add a little torn fabric loop and glued it to the back of each wise man. You can hang them if you wish.


Camel Star Craft
Materials Needed:
Scissors and Pencil
Draw and cut out a camel
Felt sheet - tan or light brown
Poster board
5 wooden craft sticks in a color of your choice – this is your star
Glue – wood glue will work the best for the craft sticks
Use a printed camel illustration, cut out the shape of the camel. (You could also draw your own camel on a blank piece of paper to cut out.)
Trace your camel shape onto the felt sheet, making sure you trace it backwards if you’re using felt with an adhesive back like we did.
Cut out your felt camel and glue onto the poster board or attach with the adhesive (if your felt has an adhesive back).
To make the Star of Bethlehem, line up two of your craft sticks in a vertical line, overlapping them a bit. Glue them together and onto your poster board. Then, glue two more craft sticks in an X shape over your vertical line. Finally, glue a third craft stick horizontally across to complete an eight-point star.
December 30, 2020
So, here we are at the end of the year 2020. Hooray!
At the end of a year, I look back over the year to think about what happened in my life. What did I accomplish, where did I go, what didn’t I accomplish, and how did I live as Jesus would have wanted me to live? After looking back, I then look forward. I ask myself, what do I want to accomplish in the new year, what is something I want to change about myself in the new year, and what can I do to shine the light of God and Jesus around me.
I ask that you do the same, look back and then look forward.
To help maybe just a little bit, I would like for you to look back at all the activities that I had posted for you to do. Find ones that you liked and do them again or find a different way to do the activity. Find ones that you didn’t do and work on them. Think of your own activity that you want to do and then get it done. Have fun with whatever you choose.
I miss you all soooo much! Have a great week and a great beginning of 2021!
Talk to you next year!
From, Mrs. A
December 23, 2020

Materials Needed:
board (poster board or a piece of foam board in the shape of a rectangle), two colors of paint, two paint brushes.
Directions:
1. Cut the board you are using so that your handprint and both footprints will fit.
2. Paint or color it with a bright red or any dark color you choose.
3. Trace a L and an E on a piece of paper. Cut it out and place it on the board to get the spacing for your footprint and handprint.
4. When you know you have the spacing right, trace around the letters.
5. Now using white or a light-colored paint, brush the inside of your hand. Place your now painted hand beside the L. Wash your hand.
6. Now paint the bottom of your feet, one at a time. Place your footprints in a V shape. Wash your feet.
7. Now paint the letter L and E with white or the same light color paint you used for your handprint and footprints.
8. Let it dry, then place where everyone can see it.

Materials:
Clear Contact Paper, Masking Tape, Tissue Paper (whatever color you would like to use), Permanent Marker
Directions:
1. Cut two large sheets of contact paper.
2. Tape the corners of one sheet to the counter and peel off the paper backing so that that sticky side of the contact paper was facing up.
3. Lay the colored tissue paper down on top of the sticky side. Smooth it out so that it is flat.
4. Cut small hearts that will fit in the palms of your hand. Place the hearts on the tissue paper. (You may want to use a glue stick to secure the hearts to the tissue paper. That will keep them from shifting.

5. Peel the paper backing off the second sheet of contact paper and smooth it out on top of the existing tissue paper and hearts.
6. Place your hand so that the heart will be in your palm. Then trace using a permanent marker. If you can, use a marker that is very close to the color of your tissue paper. You can also trace your hand on a piece of paper then cut it out and trace that onto the contact paper. Once your hand is traced, remove the masking tape. Lift the paper off the counter. Cut out the hands, and ta-da!
7. Then fold down the fingers to make the “I Love You” sign. Hang in a sunny window.
December 16, 2020
Stuffed Happy/Joyful Face
Materials Needed: Felt or construction paper
Cut two identical large circles from your felt or construction paper. Hole punch holes around the outside edges of the two felt or construction paper pieces and tie the edges with colorful yarn. Add some tissue paper or nylons or cotton filling to the inside of the happy face before tying it closed.
Hang it in your room as a reminder to be happy but always look for the JOY even when you might be having a bad day.
SIMPLE NATIVITY
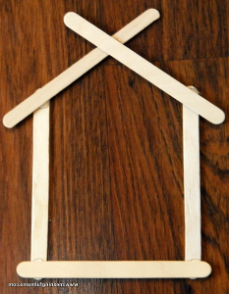
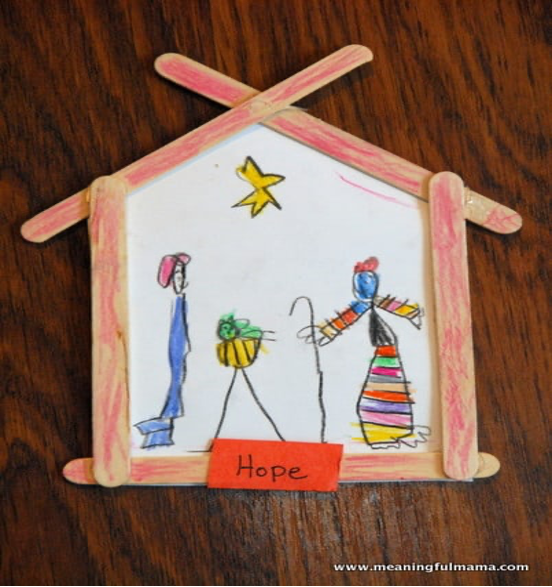
Materials Needed: 5 popsicle sticks, White card stock or any heavy white paper, Hot glue gun and glue, Crayons, colored pencils, or markers
Take 5 popsicle sticks and hot glue them together as shown above. You now have a simple barn.
Next take a white piece of card stock and trace around the outside of the popsicle barn. Then cut it out just inside of your tracing.
Hot glue the paper on the back of your barn.
While the glue dries, have mom or dad help you search for a “simple nativity” scene. Then draw your own nativity scene on the white paper inside the barn.
Use leftover white paper or construction if you have any and write the word HOPE, PEACE, JOY, and LOVE on separate pieces. Glue them onto the frame of your barn.
Write JESUS on the top sticks.
You can also use a permanent marker to write the words on each stick if you would rather do it that way. You now have an ADVENT NATIVITY SCENE. If you want, you could add yarn or string and hang it on your tree or someplace else special.
PAPER BAG BOOK
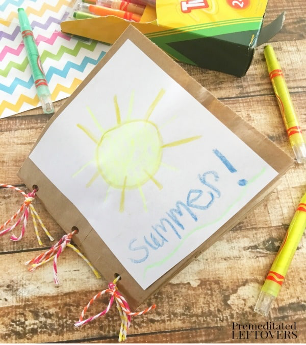
Supplies Needed: 4 brown paper lunch sacks, Colorful twine, White paper, Double-sided tape or a glue sticK, Hole punch, Measuring tape, Scissors, Crayons
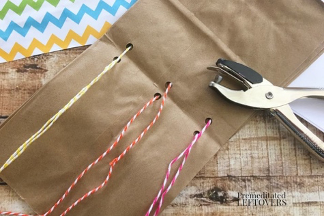
Lie your paper bags on top of each other, all facing the same way, with the fold on the back.
Fold your bags in half together and use your hole punch to punch 3 holes.
Tie a piece of colored twine in each hole and trim to about 1″ long.
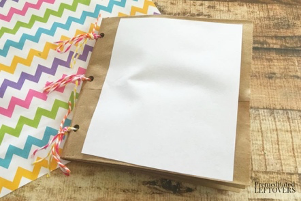
Now cut 5 pieces of white paper 5″x 4 3/4″ and use your double-sided tape to stick them onto the paper bag pages.
Write the word JOY on the front of your book.
Draw or write times where you found JOY during a bad time or a good time.
December 9, 2020
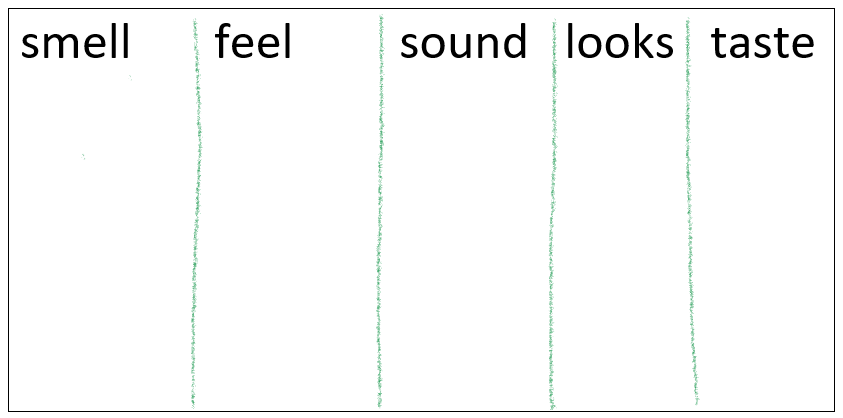
Peace Poster
Take a piece of poster board or five pieces of construction paper. Divide the poster board into 5 spaces and label each one with one of your five senses. If you are using construction paper write a sense on each paper. Write or draw what goes in each category that you think shows what PEACE is to you.

Peace Signs
Take a white paper plate... those very flimsy ones from the dollar store. They have a light coating on them so that the tape will pull up fairly easily. Put masking tape on the paper plate in the shape of a peace sign. Be sure that all the edges of the tape are down so that no paint would seep through.
Use watercolors. Cover the entire plate with as many colors as you want. After your painting has dried, carefully peel off the tape, then outline your PEACE sign with a black sharpie.


Use cardboard to make a PEACE sign. Then decorate it with anything you may have.
Examples: buttons, bottle caps, stickers, flowers, or paint.
Put a string around the top and then hang it up for everyone to see.
PEACE ROCKS
Find some smooth rocks. Look in your yard or someplace else there might be rocks and stones.
Use paint or permanent markers and decorated the rocks with peace signs or peace symbols.
Share your rock with someone or leave it in the park or on the sidewalk. A place that someone may find it. Hopefully your PEACE OFFERING will make someone think of being at peace.
Think of your own idea for sharing and showing PEACE.
December 2, 2020
CANDLE ART
Take small rectangle strips of paper and glue to a piece of construction paper to look like candles.
You can make all the candles for an Advent Wreath. You will need 4 and then one white candle to represent the Christ Candle.
Or add a candle each week during advent.
Draw a yellow flame or use yellow tissue paper to create the flame.
If you only made one candle write the word HOPE on that candle. If you made all the candles for the wreath, write HOPE on one of them.
Each week add a candle and the new word for that week.
MANGER BUILDING
Gather whatever art supplies you might have to build a manger scene.
Be creative to make your very own manger. Supplies can be chenille wire, building blocks, craft sticks, molding clay, etc.
Print the calendar below. Read a scripture a day.
There are 25 to get you to Christmas.


Advent Activities for Your Family
Make and deliver treats to neighbors.
Give Jesus a birthday gift by giving a gift to someone in need.
Donate some food to our Blessing Box.
Pray for good things for someone who has been unkind to you.
Make a handmade gift for someone.
Learn to say Merry Christmas in a few languages.
Listen to Christmas music.
Have a family night at home playing games while enjoying hot chocolate and snacks.
Watch a family Christmas movie.
Read at least one book about Christmas traditions in another country.
November 25, 2020
SHEEP AND GOAT POSTER
Get a piece of construction paper or poster board.
Draw a sheep and a goat or find a picture of a goat and of a sheep.
Glue them to the top of your paper.
Choose which is a characteristic of each animal. Write it under the sheep or goat. Remember the sheep was the positive example and the goat was the not so positive side of the story. You will find some examples below. If you think of any others please add them.
right hand, didn’t give me food or water, blessed, gave me food when hungry, gave me water when thirsty, loving, took me in, didn’t visit me or give me clothes when I needed them, clothed me, visited me, caring, helpful, not helpful, did not care for the poorest or neediest.
"I WANT TO BE A SHEEP" WALL HANGING
Take a piece of poster board and make the form of a sheep with cotton balls.
Use colorful markers to write words from our lesson today all around the cotton ball sheep. You can use the words from the sheep and goat poster.
You can also use paint or pictures or different types of writing utensils to make the plaque more interesting and decorative. Stickers of happy faces or sheep or hearts could also be added to this wall hanging.
A LIST OF THANKS
Look at the list below:
canned foods, a mini vacuum, clothes, toys, stuffed pets, cleaning products.
Think of ways that you might show your thanks to your parents with the items in mind.
Write down the ways you can help and then share them with your parents, and actually do the things that you listed.
GIVING THANKS CARDS
Take a few small colored index cards or whatever paper you might have.
Write words expressing THANKS on each card.
Hole punch one corner of each card and attach the cards together with a metal ring or a piece of yarn or thin rope.
Share these cards with other family members at home throughout advent.
THANKS COLLAGE
Cut out pictures from magazines of people showing kindness to others.
Glue the pictures onto a piece of construction paper to create a collage.
Cutting out words that show kindness to others can also be added to your collage.
Cutting out a different color of construction paper for strips that can be glued around the edges to form the picture collage border will add a special touch.
November 18, 2020
FRISBEE KIDS
Cut out a large circle or draw a circle on a piece of construction paper.
Use markers, crayons, or colored pencils to draw hands, feet, face, hair, etc. to make a "frisbee kid".
Write words from today's parable below on your frisbee kid!
Cut out the artwork and hang on a door or wall.
Words to put on your frisbee (add any other words that you feel should be on your frisbee kid): Talents, Gift, God, Parable, Jesus, Joy
GIFT BOX
Find a small box to wrap. Wrap the box.
Think of your gifts or talents that you should share. Write them on pieces of paper and place them into the gift box.
When there is a time that you forget about your own talents, open the gift box and take one of the papers out and read it to remind you that God gave you talents to share.
Then go share that talent with others.
Share your talents every day. Feel the joy in your heart and see the joy on the face of those that you share your gift with.
November 11, 2020
TELLING OTHERS
Make a "telephone" to tell others to invite JESUS into their hearts.
Take a paper cup and put a small hole in the bottom of the cup.
Put a string through the hole and tie a knot and then string it to another paper cup.
Use your telephone to tell someone about Jesus.
BE PREPARED DOOR BANNER
Take a large neon colored poster board and markers and stickers to make a door banner.
Write BE PREPARED, or the verse from Matthew 25:13 on the board.
Hole punch the top of the poster board and hang on your bedroom door to remind you to always be prepared by having Jesus in your heart.
PREPARE KITS
Take 2 pieces of construction paper and tape together - leaving the top of one sheet higher than the other, so it can be folded down over the other sheet, to be formed to look like an envelope.
Take various sizes of paper cut outs to write the following words on them and any other words about being prepared:
Be prepared, Wait, Jesus, Heart, Parable, Wise, Foolish
Then color each piece of paper and put the papers into the envelope that you made.
Write Matthew 25:1-13 on the front of the envelope.
November 4, 2020
MOVIE NIGHT
Have a movie night with your family and watch Coco.
See how the Day of the Dead is celebrated.
Fix snacks and enjoy the movie.
MEMORY BOOK
Think of memories that you have of friends, family, an event, a pet, or anything else.
Get paper and draw pictures of those memories and write a simple story or sentence telling about the memory.
Staple the pages together and make a cover for your memory book.
ALTER
Make your own alter as I did in my message.
Take a picture so that you will always have it to share with others.
October 28, 2020
Jesus replied: “Love the Lord your God with all your heart and with all your soul and with all your mind. This is the first and greatest commandment. And the second is like it: Love your neighbor as yourself.”
HEART LACING
Trace two identical hearts, cut them out, and use markers and stickers to decorate them.
Write the word LOVE several times on the back and front of your heart in both large and small letters.
Punch holes around the edge of the heart and lace in and out of the holes with colorful yarn.
Before closing the final holes with yarn, stuff some tissues into the heart to make it puffy.
LOVE IN NOODLES
Take construction paper and some type of small noodles and glue onto the paper to spell out GOD'S LOVE in noodles.
Or, make a happy face with noodles instead!
LOVE PLATE
Take construction paper and cut out mini hearts to tape or glue around the border of a paper plate.
Color the plate and write GODS LOVE in the middle, and other words from the Bible verse above.
Hang the plate by a yarn loop at the top.
October 21, 2020 - Hope
HOPE IS A BELIEF
It is what we hang on to when things are not going the way we expected or when times are tough.
It gets us through.
It gives us that glimmer that we simply can’t ignore.
It sparks a feeling in us.
It speaks to us and lets us know we shouldn’t give up because change can and will happen.
It keeps us going.
It helps us look to the future.
GROW SOMETHING
SEEDS AND BULBS REPRESENT HOPE
Plant some seeds in a flowerpot and hopefully plant them in the spring.
Watch the seeds spout and grow.
Plant some bulbs in the ground and watch them grow in the spring.
There is nothing like nurturing a new plant coming up out of the soil to teach about hope. The seed is hope for a flower, tree, or vegetable. Growing plants from seeds shows you that sometimes you have a wait a while and be patient while still having hope for something you want.
MAKE OR BUILD SOMETHING
Building or making something takes a collection of materials or supplies and turns them into something else.
A stack of wood can become a birdhouse to feed the birds in the yard.
A pile of Lincoln Logs can become a catapult.
Paper and some paint can become a beautiful piece of art.
An old cardboard box can become a castle.
A worn tire and some rope can become a swing.
A bit of dirt and some plastic dinosaurs can become a fairy garden.
Fabric and thread can become an amazing shirt.
Butter, flour, sugar and eggs can become cool cupcakes.
Building and/or making is hopeful because it shows us that we can change things by taking what is in front of us and working to turn it into something more . . . something better.
GIVE
Giving of yourself to others allows you to see that you are powerful and can make a difference.
Pick a person or a charity that you would like to help.
Begin by thinking of a simple idea you could do and get an adult to help you make it happen.
For example, if your brother or sister has been feeling sad or scared lately, think of what you could do to for them. Maybe you could make a card, say something kind, or play a game with them to help them feel better.
Or, if you hope that other kids don’t go hungry, perhaps you could do a few chores around the house, buy some canned goods and donate them to our Blessing Box at church.
Giving is related to hope because you will see that your willingness to give is a gift to others. This allows not only you, but others, to have hope for the future.
REACH FOR GOALS
Set a small goal and then plot out steps to take in order for you to complete it.
Make it achievable.
Start with a simple goal and come up with the steps you need to take to make it happen. Then figure out when you are going to do each step. You might need someone to help you with reaching your goal. Ask a brother, sister or parent to help.
Be sure to celebrate when you achieve your goal!
Hope for the future isn’t the same as wishing.
Hope has action behind it. It is not just wishing things would get better but actively doing something to help make that so.
BE GRATEFUL
There is nothing that is more important to hope than gratefulness.
You cannot be hopeful if you are not grateful for what you already have.
Start a hopefulness journal and write down things you feel hopeful toward or things that you hope will happen.
Writing it down helps to make it more real.
Being grateful shows us that we have a reason for hope. It shows you that you have more than you thought possible already. Once you know this, you are able to focus toward hope for the future.
HOPE IS FORWARD LOOKING.
HOPE IS A POSITIVE, OPTIMISTIC OUTLOOK FOR YOUR FUTURE.
HOPE HELPS US COPE WITH LIFE WHEN THINGS GET DIFFICULT.
HOPE PROVIDES A HEALTHY WAY FOR US TO LIVE AND HELPS US TO BE HAPPIER AND HAVE A MORE MEANINGFUL LIFE.
October 14, 2020
R.S.V.P 2 God Book Mark
Cut out the letters R - S - V - P and glue them to another piece of paper in the shape and size of a book mark. Or, write the letters using markers.
Use markers to write 2 GOD and write Matthew 22:1-3.
Hole punch the top and put a ribbon in the top of the book mark.
Bible Invitations
Staple together some pieces of paper to form a book. (the cover can be a colored piece of construction paper and the pages can be white)
Use your bible and look up the scriptures verses (invitations) below and write one on a page.
Draw a picture that you think would show what the invitation says.
Write BIBLE INVITATIONS on the cover of your book.
Invitations:
Revelations 22:17, Matthew 11:28, Matthew 19:14, Matthew 16:24, Hebrews 4:16, John 6:35, Isaiah 1:18, Isaiah 55:3, Psalm 101:2, Mark 10:14 and John 7:37.

Body Flipbook
SUPPLIES NEEDED
· White paper
· Crayons or colored pencils
· Scissors
· Stapler
Make a copy of the body below. You may cut out as many as you want.

Draw a character on each page.
Use crayons, colored pencils or markers to draw a character on each page. Create interesting people such as a clown, cowboy, princess, policeman, astronaut, hula dancer, scuba diver or ballerina. You can even draw your favorite cartoon character, a scary monster, a superhero, or an imaginary character.
Cut along the dotted lines.
Cut each page along the 2 horizontal dotted lines. Remember to stop cutting once you reach the solid vertical line.
Add a front and back cover.
Gather the pages together. Add a page of plain colored paper in front and another one at the back.
Staple the pages together.
Staple the pages together about ¾-inch from the left edge. This roughly corresponds to the position of the solid vertical line on the left side of each page.
Decorate the front cover.
Decorate the front cover by drawing or coloring on it.
Turn the flaps.
As you turn the flaps and make many interesting characters, have them give an excuse for not joining the party.
Tell any story you like using your flip book.
October 7, 2020 - Ten Commandments
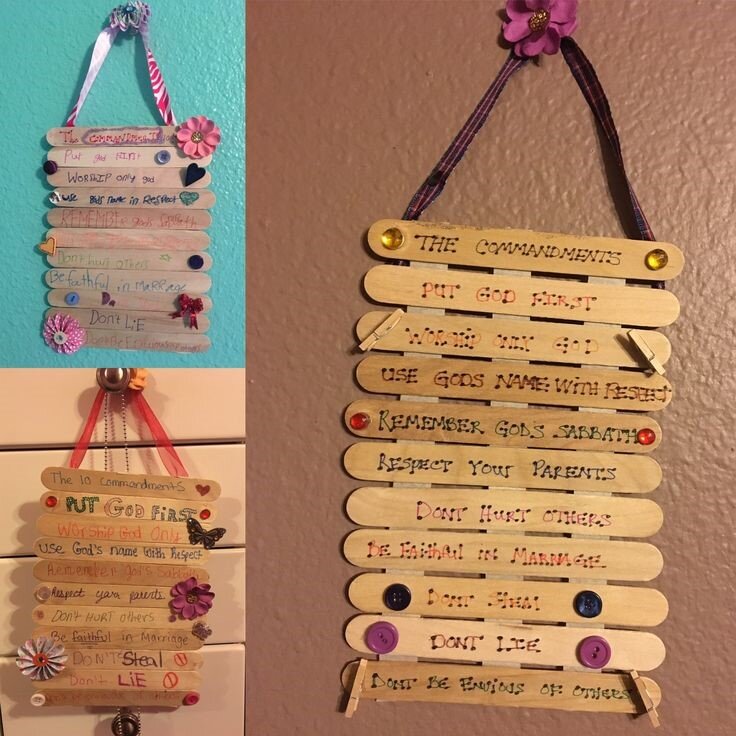
The Ten Commandments for Kids
Grab 11 craft sticks.
Get extra large sticks. You may need 3-4.
Use a sharpie and write the ten commandments below. One to a craft stick.
Glue the sticks that you wrote on to the top of the larger sticks.
Add ribbons, buttons, any decorations you like.
Hang these commandments on your fridge or doorknob. Look at them daily.

Ten Commandment Poster
Take a piece of poster board.
Draw a picture to represent each commandment.
GO OUTSIDE AND HAVE SOME FUN!!
September 30, 2020 - Simple Kindness Activities

Chalk a Friend’s Driveway
Walk or drive to a friend’s house and draw or write an uplifting message for them to find in their driveway.
Chalk a Friendly Message in Front of Your House
Write a kind message on your sidewalk so as other people walk by and when you come home you will see the kind words that you wrote.
Try words of encouragement or just smiley faces.
CALL OR VIDEO CALL FAMILY MEMBERS
THANK YOUR TEACHER FOR HELPING YOU

Flower Kindness Craft
Use construction paper and cut out petals, stem, leaf, and center of a flower.
Write a friend’s or any other person’s name on the center of the flower.
Write down words that describe that person.
Copy over their words with a black sharpie marker.
Use a glue stick to glue the leaf to the stem and the center of the flower to the stem.
Then glue each petal to the center of the flower.
Give your Friendship Flower to the person whose name is in the center to show them how special they are.

PAINT AND HIDE KINDNESS ROCKS
This one you may have already done. But it’s a good one to do often.
September 23, 2020 - God Moments

God Moments Poster
Take a piece of poster paper or any type of paper.
Draw a circle in the middle and write GOD MOMENTS in the middle of the circle.
Draw lines out from the center to the end of the paper.
Write or draw a God Moment that you have experienced.
Remember to use all of your senses; sight, taste, smell, touch, and hearing.
Color in the areas that you wrote your God Moments to make it very colorful.
Put your poster on a place that you will always be reminded, that God is always with you and to remind you to open your heart and mind so that you experience all of God’s Moments!
Have fun!
Mrs. A has made this example for you to follow.
September 16, 2020 - Forgiveness
"FORGIVENESS" SQUIGGLE CHART
Use neon markers to write FORGIVENESS on a piece of construction paper. Then draw "squiggles" circles all around the big word FORGIVENESS. Color the little squiggle circles with various crayons, while trying to count to 490! The picture will be colorful and will remind you the message about forgiveness!
FORGIVE FLOWERS
Draw a large circle in the middle of a piece of construction paper or poster board. Draw 7 petals on construction paper. Write F-O-R-G-I-V-E so each flower petal has one letter on it that spells FORGIVE. Use some chenille wire, yarn or anything else you want for the stems. Glue the petals around the circle, add the stems and glue a button in the middle of the circle if you have one. You now have a FORGIVE flower.
The most important activity you can do this week and every week is to forgive, forgive, and forgive. Remember Jesus said to forgive 70 times 7 which is equal to 490 times.
September 9, 2020 - Friends
Friend Cut Outs
Take two half sheets of construction paper. Fold back and forth (like a fan) and then draw a "friend" on the front with the hands straight out. Cut the "friends" out but do NOT cut on the fold where the hands would be. When this is unfolded, all the "friends" should be hooked together, tape to a wall or on a poster. Write MAKE A FRIEND.... LOVE AND FORGIVE! On the “friends”.
Circle of Friends
Draw and cut out 5-6 "friends" out of paper. Form the cut-outs in a circle with hands touching like they are holding hands. Glue onto a large poster board or individual construction paper posters. Write FRIENDS LOVE AND FORGIVE.
Magnetic Friends
Draw and cut out a picture of a “friend" on heavy poster board. Take pieces of cloth to glue on for a shirt, etc. Glue some yarn around the head for hair and color their "friend". Attach a magnet to the back of the "friend". As an extra, add a "sign". Tape a toothpick to the hand of your cut out "friend" and attach/tape on a small sign to the toothpick that says FRIENDS LOVE AND FORGIVE.
Friendship Bracelets
Take 3 different colors of yarn or colored string and braid them together to make a bracelet. Wrap it around your wrist and tie loosely. Make another bracelet and give it to a FRIEND!
September 2, 2020 - Back to School

August 26, 2020
CLAY BASKET AND BABY ART:
Take modeling clay or play dough to form a basket and a baby to put inside the basket. If the baskets are big enough, take a toothpick and write MOSES on the clay baskets!
LOVE AND PROTECTION COLLAGE
Take a large piece of paper, or a piece of poster board. Draw a circle in the middle of the paper. Write in very large and bright letters -- GOD'S LOVE AND PROTECTION. Then draw or write words about God's love and protection for us or for Moses -- words that you think would describe or show God's love and protection for us.
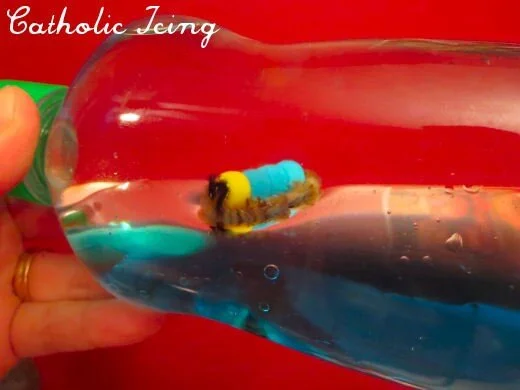
Baby Moses Wave In A Bottle
Supplies:
A clear bottle (like a water bottle)
Water
Oil (vegetable oil or baby oil)
Blue food color
Pony beads (any colors)
Pipe cleaners (Brown)
Hot glue gun
The trickiest part is getting the density of Baby Moses right so that he floats on the water but sinks in the oil.
To make Baby Moses, hot glue 3 of one-color pony beads together, then a different color bead at the top. (This is supposed to look like his blanket, and his head.) Then you bend a brown pipe cleaner around in an oval shape, and glue the baby on top. You can also add a little tuft of hair with a black pipe cleaner on top of his head.
Fill your bottle about half with water, then put in one drop of blue food color. Drop in the baby, fill the rest of the way with oil, and hot glue on the lid. That’s it!
Some tips for getting the density of Baby Moses right:
Pony beads seem to float perfectly between the oil and the water
Once you glue the pony beads together, they float on top of the oil.
Pipe cleaners will sink in water.
Therefore, the baby is too light (floats on top the oil) and the pipe cleaner basket is too heavy (sinks to the bottom of the water) so when you glue them together, they float in the middle.
You may have to experiment to get this right.
August 19, 2020 - Forgiveness

“Forgive” Acrostic
On a long piece of paper, write FORGIVE.
Write a word telling a way you can forgive someone.
(See the example to the right.)
“Forgive” Flowers
Get some paper and markers and colorful "buttons" for the middle of the flowers (to glue on).
If you don’t have buttons you can cut a circle out of paper for the middle of the flower.
Draw large flower petals and write F-O-R-G-I-V-E one letter to a petal, so each flower should have 7 petals so one letter will fit on each petal!
Use some chenille wire for the stems, if desired.
Stone Painting
Get a smooth stone to paint a cross, or write FORGIVENESS, or another word or picture from the message about Forgiveness.
Place them where you can see them or place them around a park, school, or any place that someone might find it.
August 12, 2020
POSTER
Using large poster board, magazines, newspapers, scissors, glue, and markers, make a collage of people, places, or things that can you help or you can pray for.
WATER WALKING
Take off your shoes and socks and take turns placing your feet in a shallow pan of water.
Walk on the floor or on the sidewalk and make footprints. Then have your brother or sister or friend put their feet in the water and try to walk on the exact same footprints as yours. Each child will follow after and see if they can walk on the same prints.
If someone happens to make a new print, then you can choose which foot prints you want to follow.
You walked on water!!!
WATER BALLOON ART
Fill up water balloons.
Go outside and throw the water balloon and let it "splat" on the sidewalk.
Take sidewalk chalk to trace around your water mark to create sidewalk art.
(Remember to clean up the balloon pieces and put them in the trash!)
WATER SQUIRT GUNS
You need a squirt gun and buckets of water.
Use your squirt guns to write names on the sidewalk that you can pray for.
Bible words such as Faith, Peter, Lord, Jesus, Help, or Sacred, from the message can also be written. Use your own bible and find words that you can write with your squirt gun.
HAVE FUN, TAKE PICTURES OF YOUR ART AND SEND THEM IN TO TUCCGODMOMENTS@GMAIL.COM AS A GOD MOMENT!
August 5, 2020 - Shine Your Light
FLASHLIGHT TAG
This is tag with a twist.
Flashlight tag is essentially hide-and-seek taken to a whole new level. One person is chosen to be “it” and is given a flashlight. Everyone else gets to hide in the back yard and wait to be found. The person who is “it” uses the flashlight to find everyone who is hiding. The first person to be found then becomes “it,” and the game starts over again.
SUNSET
Use a piece of construction paper or poster board. Then take crayons, tissue paper, paint, or anything else you can use to make a sunset.
Please take a picture of your sunset and send it to tuccgodmoments@gmail.com
NIGHT SKY SHINING YOUR LIGHT
Take a piece of black construction paper or poster board.
Add stars and the moon.
Use white paint, crayon, or puffy paint (if you have any).
Shine your light into the darkness.
Shine God’s love, light, and life to all the world.
July 29, 2020 - Parable of the Mustard Seed
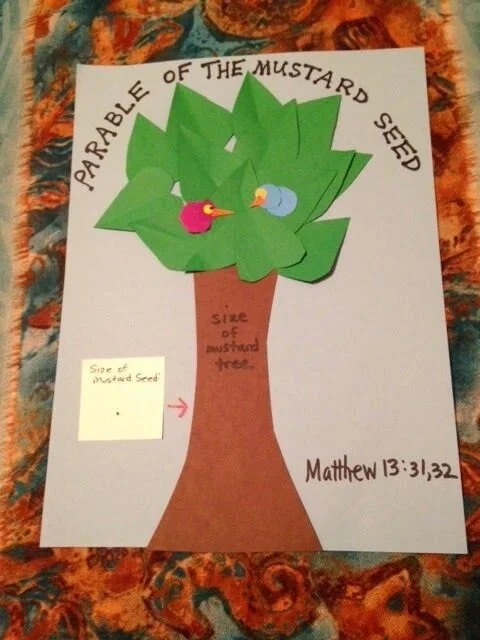
A Handy Mustard Tree
Materials needed:
Construction paper
Brown tempera paint (or anything else you might want to use to make the tree trunk and branches)
Markers
Get a legal-sized sheet of light colored construction paper.
Use your upper wrist and hand dipped in brown tempera paint to form the trunk and branches of a tree.
Use green markers, paint, or green construction paper to add leaves on the tree.
Use a marker or construction paper to create birds flying around the mustard tree.
Underneath the tree write, "Matthew 13:32"
Sandwiches
Make some sandwiches using mustard as one of the ingredients. Enjoy!
Play Hangman
Play “hangman” using words from the story:
mustard, tree, Mark, plant, grow, seeds, garden, little, birds, branches, people, church, remember, parable, ground, earth, etc.

Circle Hanging
What You need:
mustard seeds
glue
paint brushes
green yarn
scissors
hole puncher
Make a copy of the circle above.
Color in the words and cut out the circle.
Use a paint brush to lightly apply glue to the outer circle, then cover the glue with mustard seeds.
Use a hole punch to make a hole at the top of the wreath, then tie a green string so that the wreath can be hung up.
July 22, 2020 - Speaking Up
WAYS KIDS CAN SPEAK UP!
1) BE KIND
2) PRACTICE HOSPITALITY, the friendly reception and treatment of guests or strangers.
3) GIVE MONEY
GIVE SOME MONEY TO HELP JILLY
DO CHORES TO RAISE MONEY TO GIVE TO A CHARITY
4) GIVE TIME TO HELP OTHERS OR CAUSES
5) LOOK AFTER THE EARTH
6) MAKE A SIGN OR WORK OF ART
7) REFUSE TO JOIN IN NEGATIVE (BAD) BEHAVIOR
8) SEND A THANK YOU CARD
9) GIVE A GIFT
10) SMILE OR WAVE
11) READ BOOKS ABOUT ALL KINDS OF PEOPLE AND EXPERIENCES.
12) ALWAYS SPEAK OUT WHEN THINGS DON’T LOOK OR FEEL RIGHT. SAY:
‘THAT’S NOT RIGHT!’
BOOKS TO READ!
Here are a few books that I, Miss Kristen, have in my library that you might like to get and read. I can always lend you any books that I have. Just let me know by calling the church office and I will make sure that the book is available to borrow.
SPEAK UP
THE CRAYON BOX THAT TALKED
TEACH YOUR DRAGON ABOUT DIVERSITY
A IS FOR ACTIVIST
ALL ARE WELCOME
WE ALL SING WITH THE SAME VOICE
SOMEONE NEW
WHEN GOD MADE YOU
WHO COUNTS?
BE KIND
GOOD PEOPLE EVERYWHERE
WHO IS MY NEIGHBOR?
If your mom or dad has a Pinterest account, that’s a great place to look for good books.Try Amazon as well.
July 15, 2020 - The Parable of the Sower
Flower Pots
Get a ceramic pot or paper cup.
Write or tape the words GOOD SOIL on the pot.
Add some GOOD SOIL to the cup.
Plant seeds (Jesus’ message) in the GOOD SOIL.
Take a picture.
Watch the seeds grow and take pictures as they grow.
Seed Art
You will need many types of seeds.
Glue the seeds on a piece of colored construction paper to form the words, “Matthew 13:1-9, 18-23”
Hang it up where you can see it every day.
Dirt Cup Dessert!
Make chocolate pudding.
Put a small amount of chocolate pudding in the bottom of a cup.
Sprinkle with crushed up Oreo cookies to look like the SOIL from the Parable of the Sower.
Add either gummy "worms" or some sunflower "seeds" to your pudding.
You now have a great dessert with GOOD SOIL and SEEDS.
Enjoy!
July 9, 2020
BURDEN BOX
Get a box and wrap it with brown paper. Decorate it with your favorite Bible verse and the words BURDEN BOX in bright letters.
Cut a slit in the box and use small cards to write some examples of burdens that you might have on the cards and place them inside the box!
PRAY to Jesus for help with those burdens.

Paddle Balloon
To make the paddles:
Break a paint stick in two (or you can use a large popsicle stick)
Glue it to the back of a paper plate.
Add a balloon.
To play:
Toss the balloon into the air and hit it back and forth.
Don’t let the balloon touch the ground.

Stained Glass Sidewalk Chalk
Create a design by adding tape to the ground in a fun geometric design.
Next, use as many different colors of sidewalk chalk as you can find in the house… the more, the merrier!
Then, color a square until you have a beautiful stained-glass chalk design.
This is chalk art at its finest!
June 30, 2020

Process
1. Start by removing the label (if there are any) from your glass jar.
2. Cut up the tissue paper into small pieces. You can cut them into whatever shapes or pieces you want.
3. Mix up your glue paste. Mix Elmer’s glue with water – about 1-part glue to 2 parts water – but you can use less water to make it even thicker.
4. Use the paintbrush to brush the glue paste onto the glass jar. Go section by section, sticking the tissue paper to the jar as you go. Feel free to add more glue in any places the tissue doesn’t seem to be sticking as well. Go all around until the entire jar is covered as much as you would like. This is where you can really have fun with it! I like mixing all the colored pieces together and covering every open space. You can also do different variations, such as a line of blue followed by a line of green, etc. Or if you have multiple shades of one color, you could make a neat fade up the jar.
5. Let it dry so it’s no longer sticky when you touch it. Go over the jar with a bit of the glue paste in any spots where the tissue paper is not completely stuck or is coming up at all. Let it completely dry.
6. Add the tea light or small candle in the bottom of the lantern and enjoy all summer long!
Take a picture and send it to tuccgodmoments@gmail.com
Welcome Sign or Mat
Use whatever supplies you have around the house and make a welcome sign for your bedroom door, the front door, or any place you think the sign should be placed.
TAKE A PICTURE!!
Send it to tuccgodmoments@gmail.com

Sponge Water Bombs
Materials
Rectangular sponges
Scissors
String
Ruler
Marker
Use a marker and a ruler to make 1″ strips on the sponge.
Cut the sponges.
Gather 9 strips of sponge and tie them together with your string.
The pictures at the left are easy to follow.
Once they are made, make them wet and have fun throwing the wet sponges.
We would love to see pictures of these sponges being used! So, take pictures and send them to tuccgodmoments@gmail.com!
June 14, 2020
When God Made You
By: Matthew Paul Turner
1. Take out any art supplies that you have and a piece of paper. Fill up the page with a portrait of yourself, especially using your favorite color. You can draw some of your favorite objects into the design as well.
2. Make a self-portrait of just your face and neck on small, square sheets of nice art paper. Maybe 5 x 5 or 3 x 3 or any size square. Then draw portraits of other people in your life. Arrange the portraits on a piece of poster board or make a booklet out of all the faces. This is your community of people. Isn’t it amazing?
Freeze Tag
1. Have one kid be "it". If you have 10-12 kids have two kids be “it”. Set up boundaries if you are not in an enclosed yard; use trees or park benches, or other objects as markers.
2. When the people who are "it" call out "Go!" the other kids scatter in different directions.
3. The people who are "it" will try to tag the players. Any player who is tagged will freeze. They can only be unfrozen and run again if another player who has not yet been tagged touches them.
4. The last people who are not frozen become "it" in the next game.
SPUD
The object of this ball game is to run as far and as fast as possible from the person who is throwing the ball and to dodge the ball when it’s thrown at you without moving your feet. Be sure to use a very soft ball, such as a foam ball, which is specifically made to be thrown at people without hurting them.
How to play:
1. Start with a person in the middle. That person is the thrower, or "it". Everyone else should stand within arm’s reach of the thrower.
2. The thrower tosses the ball straight up into the air and spells SPUD as the ball comes back down.
3. As soon as the ball is released, players begin to run away from the thrower.
4. When the thrower catches the ball, they yell, "Spud!" at which point players immediately freeze where they are.
5. The thrower then takes 4 giant steps spelling SPUD to get closer to a player. The thrower then tries to tag a player by throwing the ball. The frozen player can try to dodge the ball but is not allowed to move his or her feet. If the player is hit, he or she will get the letter "S" and move to the middle to be the next thrower.
6. If the thrower misses, then the thrower repeats 2-5.
7. The game is played until a player gets all four letters "S-P-U-D," which means she/he is out of the game. The game continues until there is only one player left. That player is the winner.
June 8, 2020
Chromatography Butterfly Craft
Materials
Non-permanent markers
White coffee filters
Pencil
Cups of water
Black pipe cleaners
String
Scissors
Procedure
1. Choose one marker to experiment with first. (Hint~ black and brown are the most exciting!)
2. Take one coffee filter. Put it on a newspaper or some kind of material to protect your table. Draw a thick circle around the center of the coffee filter where the ridged part meets the flat center. Use a pencil to write the color of the marker being used right in the center. (You’ll want to know what the original color was being used, and the pencil won’t smear and will remain intact after the experiment.)
3. Fold the coffee filter in half and then in half again, resulting in a cone shape.
4. Get a short glass of water. Pull apart the cone shaped coffee filter so it balances right on the glass with the tip of the cone just touching the water.

(Be sure NOT to let the marker circle go in the water, just the uncolored tip of the coffee filter cone.)
5. Let it sit and watch what happens as the water begins to flow up the paper.
6. Repeat with different colored markers. Here are ours starting out…
7. After the water has reached the outer edge of the coffee filter, place it on a newspaper to dry.
Directions for Using Coffee Filters to Make the Butterfly Craft
Cut black pipe cleaners in half.
Take one coffee filter and scrunch it up in the middle.
Wrap a black pipe cleaner around the center.
Shape the ends to form an antennae.
Tie a string to the center and hang!
Butterfly Craft

Materials Needed:
Mixed Media (or watercolor) paper or any paper you might have
liquid watercolors, markers, crayons, or colored pencils
paintbrush
glue
Shimmer Poms
Wooden Scoop Stick
Wiggly Eyes
pipe cleaners
hot glue gun
scissors
1. Begin by drawing your butterfly wings on your mixed media or watercolor paper. Use your liquid watercolors to paint the butterfly wings. When the watercolors have finished drying cut out your butterfly wings.
2. Add some fun lines and dot details to your butterfly wings with your school glue. Then shake neon glitter onto the glue. Shake off any excess glitter and set aside to dry.
3. Heat up your hot glue gun. For your butterfly body, grab a large shimmer pom and 4 medium shimmer poms and hot glue them onto the scoop stick. Cut two sections off your pipe cleaner, bend the ends down to make antennae and hot glue them behind the butterfly head. Then hot glue your wiggly eyes onto your large shimmer pom.
4. Finish your gorgeous butterfly craft by hot gluing the butterfly body in the center of the watercolor butterfly wings.
Ping-Pong Toss
Fill plastic cups halfway with water and place in five rows. Label each cup with a score, making sure that the cups closest to the kids are worth one point and that the cups farthest away are worth the highest amount of points. Set out a basket of ping-pong balls and have the kids take turns tossing their balls into the cups. Each player gets 30 seconds to toss as many ping pong balls as they can. The player with the highest score at the end, wins.

Bean Bag
Ladder Toss
Grab a step ladder from the garage for this one. Label each of the rungs with points and have the kids toss bean bags to see how many points they can get.
June 1, 2020
KITE DAY
Take a day and fly a kite. You can either buy one or make a kite. Watch the wind fly your kite. Here’s a very simple kite to make. There are many ways to make a kite, you just need to look on Pinterest.
SUPPLIES NEEDED FOR PAPER BAG KITES
paper lunch bags
yarn or strong twine/string
popsicle stick
scissors
streamers
tape
scissors
embellishments: stickers, paint, markers, crayons, construction paper, washi tape
DIRECTIONS
To get started, decorate the paper bags using a variety of embellishments. Stickers and washi tape work really well to add some fun prints and colors! You can also draw designs with markers and crayons or add polka dots and stripes using washable paints. Just make sure the paint is dry before moving on to the next step.
Using a pair of scissors, snip a little hole on the bottom base of the bag. This will be used for the kite string.
Cut a piece of yarn or string about 18-24 inches long. Tie one end to the middle of a popsicle stick and feed the other end through the hole in the bag. The popsicle stick will keep the kite string from pulling out when it’s flying.
Attach streamers to the open end of the bag using tape. Now the kite is ready to fly!
FLASHLIGHT GAMES FOR KIDS
Flashlight hide-and-seek – The person who is “it” is the one with the flashlight making it more challenging to find a good hiding place! A simple tag with the beam of light is considered a “catch”.
Flashlight capture the flag – Set some boundaries in your yard or nearby park and use lit flashlights for the flag. Covering the light is against the rules and when your team sees the light you are guarding moving, you better get moving too!
Flashlight freeze – Get silly and work out the wiggles by dancing and moving until the flashlight beam hits which is the signal to freeze! Those who move in the light are out!
Flashlight puppet show – Shadow puppets are always popular and you can set up a light stage with a simple flashlight and a smooth surface.

Holy Spirit Pinwheel
Make a simple pinwheel using the template provided.
(You can make your pinwheel larger than the template.)
Decorate your pinwheel.
After the pinwheel is completed, run and watch your pinwheel move with the wind - or place them in front of a fan. Even though you can't SEE the wind you know it is there because you see the pinwheel moving. Just like the Holy Spirit can’t be seen, but we know that it is with us.
May 22, 2020

Mini Hockey Sticks
1. You’ll need red duct tape, (or any color you like), large Popsicle sticks, a glue gun, black buttons and scissors.
2. Cut the bottom quarter of a Popsicle stick at an angle. Snip strips of duct tape about a centimeter wide.
3. Glue the angled Popsicle stick piece to one end of the full-length Popsicle stick. Adhere the duct tape strips to the blade and shaft, imitating hockey tape.
4. Have fun playing table top hockey with your mini hockey sticks and buttons!

Hopscotch with a Twist!
MATERIALS NEEDED:
1. Sidewalk Chalk
2. Flat stones, a bean bag, or anything that you can toss on the hopscotch board.
3. Imagination
Think of actions and motions for the game.
Draw your hopscotch path with chalk adding your ideas to each space.
Use the one above as an example or copy it if you like.
TO PLAY:
Version 1
Toss your stone or bean bag to land on the first space.
If it lands on a line, or outside the space you lose a turn.
Hop to that space on one foot.
Do what the space says to do.
Hop on one space to the end and back on one foot.
When you get to the space with your stone hop over to the end.
The next person takes a turn.
Version 2
Toss your stone to a space.
If your stone lands on a line or outside of a space, you lose that turn.
Hop on one foot until you get to the space. Do what it says to do. Leave your stone on the space.
Next person in line tosses their stone to a space, hops on one foot to that space, do what it says.
When it’s your turn again, go to the space where your stone is and toss from there. Hop on one foot to the new space and then do what it says. Continue until someone gets to the end.
Version 3
Make up your own rules.

Prayer Chain
Make your own prayer chain.
Write down the things, or people that you prayed for on a strip of paper.
Staple it into a circle.
As you add names to strips of paper add them to your chain.
Hang your chain up so that you can see it each day as a reminder to say a little prayer.
Be sure to take a picture of your chain and send it to TUCCGodmoments@gmail.com.
May 15, 2020


Mother’s Day 2020


This game involves just a few simple supplies:
A bucket (or tub) full of water, sidewalk chalk, and sponges.
First, use the sidewalk chalk to draw a bullseye on your driveway or sidewalk.
The mission is to throw the wet sponges onto the bullseye, with the goal of getting as many sponges as possible on the yellow center dot.
You could give a certain number of points per color zone. Keep track of where each sponge lands, tally the score, and determine a winner.


Holy Week Activities


April 1, 2020 Activity


March 26, 2020 Activity
During Lent the theme has been about God's creation. Let's look for God's creation through a scavenger hunt.
Use the scavenger hunt below and go on a nature walk. Collect or take a picture of the items listed. Check them off as you find them. Organize them in a way so that you can take a picture and send to me to show me what you found. Email: kdabeach@gmail.com.
Happy Hunting,
Mrs. A
